Blanket Ladder Plans PDF: A Comprehensive Guide (Updated 12/22/2025)
Detailed plans, including cutting lists and assembly techniques, are readily available online as of today, 12/22/2025․
Consider felt pads to prevent wall scratches, and pre-drilling for dowels adds strength!
Blanket ladders represent a stylish and practical storage solution, moving beyond simple functionality to become a decorative element within the home․ These ladders offer an attractive alternative to folded blankets draped over furniture or crammed into closets․ As of December 22, 2025, numerous online resources provide blanket ladder plans PDF formats, catering to various skill levels – from beginner woodworkers to experienced DIY enthusiasts․
The appeal lies in their ability to showcase textures and colors, transforming blankets into a visual display․ JCPenney and Nordstrom offer diverse blanket options perfect for showcasing on a newly built ladder․ Remember practical considerations; adding felt pads protects walls from scratches, a common issue noted by homeowners․ Successful builds often incorporate pre-drilled dowels and countersunk screws for enhanced structural integrity, ensuring both beauty and durability․
Why Build a Blanket Ladder? – Style and Functionality
Building a blanket ladder offers a unique blend of aesthetic appeal and practical storage․ Beyond simply organizing blankets, a well-crafted ladder elevates a room’s décor, turning cozy textiles into a visual feature․ Numerous blanket ladder plans PDF are available online, empowering individuals to create a custom piece tailored to their style and space․
The functionality is undeniable – blankets are readily accessible and beautifully displayed, unlike hidden storage․ Consider the diverse blanket options from retailers like JCPenney and Nordstrom when planning your design․ A key benefit, highlighted by user feedback, is preventing wall scratches with felt pads․ Furthermore, a sturdy construction, utilizing techniques like dowel reinforcement, ensures long-lasting use and reliable blanket support․
Materials Needed for a DIY Blanket Ladder
DIY blanket ladder plans PDF typically call for readily available materials․ Wood selection is crucial – pine and fir are cost-effective, while hardwoods offer superior durability․ Essential fasteners include wood screws (consider countersinking!), wood glue (sealing end grain improves adhesion), and optional dowels for added structural integrity․
Finishing supplies depend on your desired aesthetic: stain, paint, and a protective sealant are common choices․ Don’t forget sandpaper for preparation! User advice suggests pre-drilling for dowels and plugs for a clean finish․ Remember to factor in felt pads to protect your walls from scratches, a frequently mentioned tip from experienced builders․ A comprehensive materials list is usually included within detailed blanket ladder plans PDF․
Wood Selection: Pine, Fir, or Hardwood?
Blanket ladder plans PDF often present a choice of wood types, each with pros and cons․ Pine and fir are popular for their affordability and ease of workability, making them ideal for beginners․ However, they are softer woods and may be more prone to dents and scratches․
Hardwoods, such as maple or oak, offer superior durability and a more premium look, but come at a higher cost and require more effort to cut and assemble․ The choice depends on your budget, skill level, and desired aesthetic․ Consider the weight of the blankets you plan to display; hardwoods provide better support for heavier throws․ Detailed blanket ladder plans PDF may specify recommended wood thicknesses․
Fasteners: Screws, Glue, and Dowels
Blanket ladder plans PDF commonly recommend a combination of fasteners for optimal strength and stability․ Wood glue is essential for creating strong bonds between ladder components, particularly when joining end grain․ A technique involves applying glue, letting it partially dry to seal the grain, then adding a fresh coat for attachment․
Screws provide additional holding power, and countersinking them followed by plugging the holes creates a clean, finished look․ Dowels further reinforce the structure, especially at the joints․ Pre-drilling for dowels is advised․ The blanket ladder plans PDF should detail screw sizes and dowel diameters for a secure build․
Finishing Supplies: Stain, Paint, and Sealant
Blanket ladder plans PDF guides often emphasize the importance of a durable finish․ Stain enhances the wood’s natural grain, while paint allows for customized color schemes, aligning with various home décor styles – rustic or modern․ Selecting high-quality products is crucial for longevity․
A sealant protects the wood from moisture and wear, ensuring the ladder withstands regular use․ Consider a sealant that prevents scratches, especially where the ladder leans against walls; felt pads are also recommended․ The blanket ladder plans PDF may suggest specific types of stain, paint, and sealant based on the chosen wood and desired aesthetic․

Construction Plans & Techniques
Blanket ladder plans PDF detail cutting wood, assembling sides, and attaching rungs with specific angles and spacing for optimal blanket support and stability․
Step 1: Cutting the Wood for Your Ladder
Precisely cutting the wood is fundamental to a sturdy blanket ladder․ Plans typically specify lengths for the side rails and rungs, varying based on desired ladder height․ Ensure accurate measurements before cutting pine, fir, or hardwood – the choice impacts aesthetics and durability․
A miter saw is ideal for clean, angled cuts, especially for the rungs․ Double-check all measurements against your blanket ladder plans PDF before committing to any cuts․ Remember to account for the thickness of the wood when calculating rung lengths․
Sanding the cut edges immediately prevents splinters and prepares the wood for assembly․ Prioritize safety by wearing eye protection and using appropriate cutting tools․ Accurate cuts now will save significant time and frustration during assembly!
Step 2: Assembling the Ladder Sides
With the wood cut, assembling the ladder sides is the next crucial step․ Begin by laying out the side rails and marking the positions for the rungs, referencing your blanket ladder plans PDF for accurate spacing․ Pre-drilling pilot holes is highly recommended to prevent wood splitting, especially when using screws․

Apply wood glue to the joining surfaces before securing with screws․ Countersinking the screws creates a flush finish, and plugging the holes adds a refined look – a technique mentioned for enhanced aesthetics․ Ensure the sides are perfectly aligned and square during this process․
Clamps are invaluable for holding the pieces firmly together while the glue dries, guaranteeing a strong and stable ladder frame․ Allow sufficient drying time before proceeding to the next step․
Step 3: Attaching the Rungs – Angle and Spacing
Attaching the rungs correctly is vital for both aesthetics and functionality, as detailed in your blanket ladder plans PDF․ While a slight tilt is suggested for general ladders, it’s deemed unnecessary for blanket ladders – focusing on secure attachment is key․ Precise rung spacing, dictated by blanket sizes, ensures optimal display․
Begin by applying wood glue to the rung ends and the corresponding marks on the ladder sides․ Secure each rung with screws, again utilizing pre-drilling and countersinking for a clean finish․ Consistent spacing between rungs is crucial for visual balance and accommodating various blanket thicknesses․
Double-check alignment before the glue fully sets, ensuring a level and stable structure․
Rung Angle Considerations for Blanket Support
Regarding rung angles, blanket ladder plans often suggest a slight tilt for standard ladders, but this isn’t strictly necessary for blanket display․ The primary function isn’t weight-bearing in the same way; it’s providing a visual perch for folded textiles;
However, a gentle angle can prevent blankets from sliding off, particularly lighter-weight throws․ If incorporating an angle, ensure consistency across all rungs for a uniform appearance․ A steeper angle might look aesthetically pleasing but could reduce usable space․
Ultimately, the decision depends on the blankets’ texture and weight․ Prioritize secure attachment over a pronounced angle, focusing on a stable and visually appealing structure․
Optimal Rung Spacing for Different Blanket Sizes
Determining optimal rung spacing is crucial for showcasing blankets effectively․ Consider the variety of blanket sizes you intend to display – from lightweight throws to larger, plush cotton bedding and faux-fur blankets․
Generally, spacing between 8 to 12 inches accommodates most standard throw blankets comfortably․ For larger blankets, increase the spacing to 12 to 16 inches․ Consistent spacing creates a visually balanced ladder․

JCPenney and Nordstrom offer diverse blanket sizes; plan accordingly․ Measure your largest blankets to ensure sufficient space․ Remember, a well-arranged ladder enhances visual appeal, so adjust spacing to highlight textures and colors beautifully․
Step 4: Reinforcing the Ladder Structure
A sturdy blanket ladder requires robust reinforcement to withstand repeated use and blanket weight․ Several techniques enhance structural integrity, ensuring long-lasting durability․
Utilizing dowels is highly recommended; pre-drill halfway for insertion, then apply glue to both dowel and wood․ Countersinking screws provides a flush finish, minimizing visibility․ Subsequently, plug the screw holes with wood plugs, flush-cut, and sand smooth for a professional appearance․
Remember, gluing end grain alone isn’t sufficient; sealing the grain before final attachment significantly improves bond strength․ This combination of dowels, countersunk screws, and plugs creates a remarkably strong and aesthetically pleasing ladder frame․
Using Dowels for Added Strength
Incorporating dowels into your blanket ladder construction dramatically increases its strength and stability․ This method provides a mechanical connection that complements the adhesive bond, resisting stress and preventing joint failure over time․
The process involves pre-drilling holes halfway into both connecting wood pieces․ Select dowels with a snug fit to ensure maximum surface contact․ Apply wood glue liberally to both the dowel and the inside of the drilled holes․ Insert the dowel, ensuring a tight connection․
Dowels are particularly effective when combined with countersunk screws, creating a hybrid fastening system․ This dual approach delivers exceptional structural integrity, capable of supporting substantial blanket loads and frequent use․
Countersinking Screws and Plugging Holes
For a refined aesthetic and enhanced structural integrity, countersinking screws is highly recommended․ This technique conceals the screw heads below the wood surface, creating a cleaner look and preventing snagging on blankets․
Begin by drilling a pilot hole slightly smaller than the screw’s shank․ Then, use a countersink bit to create a conical recess for the screw head․ Drive the screw flush with, or slightly below, the surface․ Following this, carefully plug the countersunk hole with a wood plug matching the ladder’s wood type․
After the glue dries, flush-cut the plugs with a sharp chisel or flush-cut saw, and sand them smooth for a seamless finish․ This method provides a robust and visually appealing connection, blending functionality with craftsmanship․

Finishing and Protection
Sanding prepares the wood for stain, paint, or sealant․ Applying a protective finish, like sealant, ensures durability, and felt pads prevent wall scratches!
Step 5: Sanding and Preparing for Finish
Proper sanding is crucial for a professional-looking finish on your blanket ladder․ Begin with a coarser grit sandpaper – around 80 or 100 – to remove any imperfections, rough spots, or mill marks from the wood․ Progress to medium-grit sandpaper (120-150) to smooth the surface further, and finally, finish with a fine-grit sandpaper (220 or higher) for an exceptionally smooth texture․
Thoroughly remove all sanding dust with a tack cloth or a slightly damp cloth before applying any finish․ This ensures the stain or paint adheres properly and prevents a grainy texture․ Pay close attention to edges and corners, ensuring they are rounded slightly for a more comfortable and aesthetically pleasing result․ A well-prepared surface is the foundation for a beautiful and durable finish․
Step 6: Applying Stain or Paint
Choosing between stain and paint depends on your desired aesthetic․ Stain enhances the wood’s natural grain, offering a rustic or traditional look, while paint provides a solid color and allows for more creative expression․ Apply stain or paint in thin, even coats, following the manufacturer’s instructions․ For stain, wipe off excess after a few minutes to control the color intensity․
Allow each coat to dry completely before applying the next․ Lightly sand between coats with fine-grit sandpaper (220+) to remove any imperfections and ensure a smooth finish․ Multiple thin coats are preferable to one thick coat, preventing drips and ensuring even coverage․ Consider the blanket colors you plan to display when selecting your finish․
Step 7: Sealing the Wood for Durability
Applying a sealant protects your blanket ladder from moisture, scratches, and everyday wear and tear․ Polyurethane, varnish, or lacquer are excellent sealant options, available in various sheens – matte, satin, or gloss․ Apply the sealant in thin, even coats, using a brush or spray applicator, following the manufacturer’s directions carefully․
Allow each coat to dry completely before applying the next, and lightly sand between coats with fine-grit sandpaper for a smoother finish․ Crucially, attach felt pads to the top ends that lean against the wall to prevent scratches․ Two to three coats of sealant are recommended for optimal protection and longevity․
Protecting Against Wall Scratches – Felt Pads
Preventing damage to your walls is a simple yet vital step in preserving both your ladder and your home’s aesthetic․ Blanket ladders, particularly leaning designs, frequently come into contact with walls during use as blankets are removed or replaced․
Applying self-adhesive felt pads to the top ends of the ladder, where it rests against the wall, creates a protective barrier․ This prevents unsightly scratches and scuffs from occurring․ Choose felt pads that are appropriately sized for the ladder’s contact points and ensure they are securely adhered․ Regularly inspect and replace the felt pads as they wear down to maintain optimal protection․
Blanket Ladder Design Variations
Explore lean-to or freestanding styles, rustic or modern aesthetics, and customize height/width to perfectly suit your blanket display needs and space!
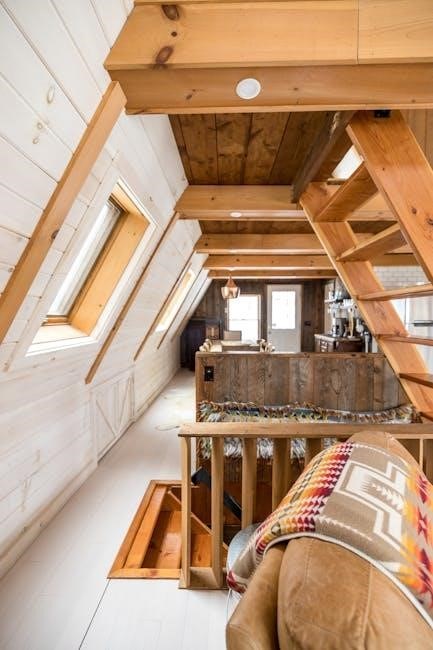
Lean-to vs․ Freestanding Blanket Ladder Designs
Lean-to blanket ladders are designed to rest against a wall, offering a space-saving solution, particularly ideal for smaller rooms․ However, they require wall support for stability, and as noted on 12/22/2025, felt pads are crucial to prevent wall scratches from repeated use․
Freestanding blanket ladders, conversely, stand independently, providing flexibility in placement․ They don’t necessitate wall contact, allowing for repositioning as desired․ However, they generally occupy more floor space and must have a wider base for enhanced stability, especially when loaded with blankets․
Choosing between the two depends on your available space, aesthetic preferences, and the weight capacity needed for your blanket collection․ Careful consideration of these factors will ensure a functional and visually appealing addition to your home․
Rustic vs․ Modern Blanket Ladder Styles
Rustic blanket ladders typically feature distressed wood finishes, emphasizing natural grain and imperfections․ They evoke a warm, cozy aesthetic, often complementing farmhouse or traditional décor․ Construction may involve simpler joinery techniques, enhancing the handcrafted feel․ Think reclaimed wood and visible knots!
Modern blanket ladders, in contrast, prioritize clean lines, smooth surfaces, and minimalist designs․ They often utilize painted finishes or sleek wood stains, aligning with contemporary interiors․ Precision in construction and hidden fasteners are hallmarks of this style․
The choice hinges on your existing home décor․ As of 12/22/2025, both styles are popular, with JCPenney and Nordstrom offering blankets to complement either aesthetic․ Consider the overall ambiance you wish to create when selecting your design․
Customizing Ladder Height and Width
Adjusting ladder dimensions allows for tailored blanket display․ Taller ladders accommodate longer throws and quilts, while shorter versions suit smaller spaces․ Width impacts the number of blankets showcased; wider ladders offer greater capacity․
When modifying plans, maintain structural integrity․ Increasing height necessitates stronger rungs and potentially thicker side supports․ Wider ladders require a broader base for stability – consider wall anchoring! Remember the weight capacity and blanket load․
As of 12/22/2025, readily available plans can be adapted․ Consider the blankets you intend to display – JCPenney and Nordstrom offer diverse sizes – and measure your available wall space before finalizing dimensions․ Careful planning ensures a functional and aesthetically pleasing result․

Blanket Selection & Display

Choose blankets with varying textures and colors from retailers like JCPenney and Nordstrom for visual appeal․ Arrange them artfully, considering both warmth and aesthetic balance!
Choosing Blankets for Display – Textures and Colors
Selecting the right blankets elevates your blanket ladder from functional storage to a beautiful home décor element․ Consider a diverse range of textures – lightweight woven throws, plush cotton, cozy fleece, and luxurious faux fur all contribute visual interest․ Don’t shy away from incorporating knit blankets for subtle textural appeal, adding warmth and sophistication to the display․
Color coordination is key․ Mix and match blankets in complementary colors or create a gradient effect for a cohesive look․ Explore options from retailers like JCPenney and Nordstrom, where you’ll find an extensive collection catering to various styles and seasons․ A well-chosen palette enhances the overall aesthetic, transforming your blankets into a curated art installation․
JCPenney & Nordstrom Blanket Options
Both JCPenney and Nordstrom offer a vast selection of blankets ideal for displaying on your newly built ladder․ JCPenney boasts an extensive collection blending comfort and style, featuring lightweight woven options and ultra-cozy fleece throws perfect for every season․ They provide affordable choices to fill your ladder with varied textures and colors․
Nordstrom, conversely, specializes in higher-end materials like cashmere and wool blankets, alongside soft plush fleece and faux fur throws․ Their range includes diverse patterns and sizes, allowing for a more curated and luxurious display․ Explore both retailers to find blankets that complement your home décor and personal taste, maximizing the visual impact of your blanket ladder․
Arranging Blankets for Visual Appeal
Maximize the aesthetic impact of your blanket ladder by thoughtfully arranging your chosen textiles․ Begin by layering blankets of varying textures and colors, creating visual depth and interest․ Consider a gradient effect, transitioning from lighter shades at the top to darker hues below, or vice versa․
Fold blankets in different ways – some neatly folded, others casually draped – to add dynamic contrast․ Incorporate knit blankets for subtle textural appeal, elevating the overall look․ Don’t be afraid to experiment with patterns and sizes, ensuring a balanced and harmonious display․ Regularly rotate blankets to refresh the arrangement and showcase your collection․
Safety Considerations
Ensure ladder stability with wall anchoring, especially with frequent use․ Consider weight capacity and blanket load to prevent tipping; felt pads protect walls!
Ladder Stability and Wall Anchoring
Maintaining blanket ladder stability is paramount for safety, particularly in homes with children or pets․ Leaning ladders, by their nature, rely on friction against the wall, which can be insufficient․
Therefore, incorporating wall anchoring is highly recommended․ A simple solution, as noted by experienced users, involves applying felt pads to the top ends that contact the wall․
This prevents rubbing and potential damage, but doesn’t address stability․ For a more secure fix, consider using L-brackets or similar hardware to physically attach the ladder to wall studs․
This is especially crucial if the ladder is frequently loaded with heavier blankets from sources like JCPenney or Nordstrom․ Regularly inspect the anchoring hardware to ensure it remains secure and effective over time․
Weight Capacity and Blanket Load
Determining the appropriate weight capacity for your DIY blanket ladder is crucial for preventing structural failure and ensuring safe use․ The capacity depends heavily on the wood selected – hardwood naturally supports more weight than pine or fir․
Consider the combined weight of the blankets you intend to display; options from retailers like JCPenney and Nordstrom vary significantly in material and density․
Overloading the ladder can lead to tipping or even breakage․ Reinforcing the structure with dowels and properly countersinking screws, as suggested in construction techniques, will enhance its load-bearing capability․
Regularly assess the blanket load and avoid exceeding a reasonable limit based on your ladder’s construction and materials․ Prioritize safety!