
Yard Machines Powermore 140cc Manual: Article Plan
This comprehensive guide details the 140cc Powermore engine, covering assembly, operation, maintenance, and troubleshooting for optimal lawn care performance.
It includes insights into the 2-in-1 deck, height adjustments, and sourcing replacement parts, alongside official manual access and warranty details.
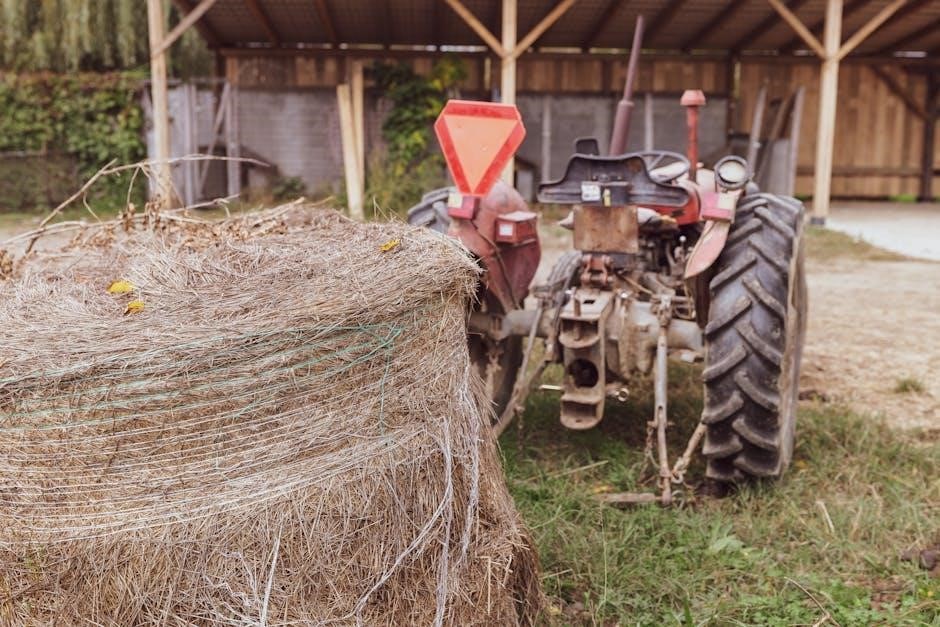
The Yard Machines Powermore 140cc engine represents a reliable power source for homeowners seeking an efficient and affordable lawn mowing solution. This engine, commonly found in Yard Machines’ 21-inch self-propelled mowers, is designed for straightforward operation and relatively simple maintenance.
Powered by a 140cc OHV (Overhead Valve) configuration, it delivers 5.5 gross torque, providing sufficient power for tackling typical residential lawns. The recoil starting system ensures quick and easy engine ignition, while the single-speed, front-wheel-drive system enhances maneuverability.
This engine’s popularity stems from its balance of performance and cost-effectiveness, making it a popular choice for budget-conscious consumers. Understanding its components, operation, and maintenance procedures is crucial for maximizing its lifespan and ensuring optimal lawn care results. This guide will provide detailed instructions and insights into all aspects of the Powermore 140cc engine.
Engine Specifications & Overview
The Yard Machines Powermore 140cc engine boasts key specifications defining its performance capabilities. It’s an OHV (Overhead Valve) single-cylinder engine, displacing 140 cubic centimeters. This configuration contributes to improved fuel efficiency and reduced emissions.
Gross torque measures 5.5 ft-lbs, indicating the engine’s rotational force. The engine utilizes a recoil starter for manual ignition, eliminating the need for electric starting components. It’s designed to operate on unleaded gasoline with a minimum octane rating of 87.
The engine’s construction prioritizes durability and ease of maintenance. It features a standard air cooling system and a typical splash lubrication method. Understanding these specifications is vital for selecting the correct oil type, spark plug, and other replacement parts, ensuring optimal engine performance and longevity.
Unboxing and Initial Inspection
Upon receiving your Yard Machines Powermore mower, carefully inspect the shipping carton for any visible damage before opening. Once opened, meticulously inventory all components against the parts list included in the manual. Confirm the presence of the engine, handlebars, wheels, and the operator’s manual itself.
Check for any shipping-related damage to the engine housing, deck, or other parts. Note any scratches, dents, or broken components immediately. Organize smaller hardware – bolts, nuts, washers, and cables – to prevent loss during assembly.
A thorough initial inspection ensures you have everything needed and identifies potential issues before you begin assembly, saving time and frustration later. Document any discrepancies and contact the retailer or manufacturer if parts are missing or damaged.
Component Identification
The Yard Machines Powermore mower consists of several key components. The engine, a 140cc OHV Powermore, provides the power. The handlebars control steering and often house the safety controls. Wheels – typically 8-inch front and rear – enable maneuverability. The manual is crucial for assembly, operation, and maintenance.
The 2-in-1 deck facilitates both side discharge and mulching. Identify the discharge chute and mulch plug. Locate the height adjustment levers, controlling cutting height from 1.25 to 3.75 inches. Familiarize yourself with the recoil starter assembly and fuel tank location.
Understanding each component’s function and location is vital before beginning assembly. Refer to the exploded parts diagram in the manual for detailed illustrations and part numbers.
Key Engine Parts
The 140cc Powermore engine features several critical parts. The cylinder head houses the valves and combustion chamber. The cylinder contains the piston, converting combustion into motion. The piston moves within the cylinder, driven by expanding gases. The connecting rod links the piston to the crankshaft.
The crankshaft converts reciprocating motion into rotational power. The carburetor mixes air and fuel for combustion. The spark plug ignites the air-fuel mixture. The recoil starter initiates engine rotation. The oil fill cap and dipstick are essential for lubrication.
Proper identification of these parts is crucial for maintenance and troubleshooting. Refer to the engine’s parts diagram in the manual for detailed illustrations and component names.
Handlebar and Wheel Assembly
The Yard Machines Powermore features a two-piece handlebar that requires assembly. Typically, this involves aligning the upper and lower handlebar sections and securing them with bolts and washers. Ensure proper alignment for comfortable operation.
Wheel installation is straightforward, involving sliding the wheels onto the axle stubs and securing them with cotter pins or washers. Confirm the wheels rotate freely after installation. Front and rear wheels are 8 inches in diameter, providing maneuverability.
Double-check all connections are tight before operation. Loose components can lead to instability and potential safety hazards. Refer to the assembly diagram in the manual for precise instructions and torque specifications.
Included Hardware & Manual
Upon unboxing your Yard Machines Powermore, carefully inventory all included hardware. This typically consists of bolts, nuts, washers, cotter pins, and potentially a wrench for basic assembly. A comprehensive owner’s manual is a crucial component, providing detailed instructions and safety guidelines.
The manual outlines assembly procedures, operating instructions, maintenance schedules, and troubleshooting tips. Key parts like the engine, handlebars, and wheels are referenced within. Ensure all listed parts are present and undamaged before proceeding.
Retain the manual for future reference, especially when performing maintenance or seeking replacement parts. Downloadable versions are also available online for convenience.

Assembly Instructions
Begin by unpacking all components and verifying against the parts list in the owner’s manual. Attach the handlebar to the mower deck, securing it with the provided bolts and washers. Ensure proper alignment for comfortable operation. Next, install the wheels, again using the included hardware, and confirm they rotate freely.
Connect any cables or linkages as illustrated in the manual, paying close attention to routing and securement. Double-check all fasteners for tightness before proceeding. Proper assembly is crucial for safe and efficient operation of your Yard Machines Powermore.
Refer to the manual’s diagrams for visual guidance throughout the process.
Starting the Engine
Before the first start, verify the oil level is correct and the fuel tank contains fresh gasoline. Ensure the blade is free from obstructions. Engage the blade control lever and firmly grasp the recoil starter handle. Pull the cord with a smooth, steady motion – avoid jerking.
The engine should ignite after a few pulls. If it doesn’t, re-check fuel and spark plug connections. Once running, allow the engine to warm up for a brief initial run-in period. This helps seat the piston rings and ensures optimal performance.
Always follow safety precautions outlined in the manual during operation.
Recoil Start Procedure
To initiate the recoil start, first ensure the mower is on a level surface and the blade is disengaged. Confirm sufficient fuel and oil levels. Firmly press the primer bulb (if equipped) several times to introduce fuel into the carburetor. Next, position the throttle control to the ‘choke’ or ‘start’ position.
Grasp the recoil starter handle with a secure grip. Slowly pull the cord outwards until resistance is felt, then give it a brisk, full pull. Repeat this motion if the engine doesn’t start on the first attempt. Avoid retracting the cord quickly, allowing it to rewind smoothly.
Once started, gradually adjust the throttle.
Initial Run-In Period
The first five hours of operation constitute a crucial run-in period for your new Yard Machines Powermore 140cc engine. Avoid subjecting the engine to heavy loads or prolonged use at full throttle during this time. Vary the engine speed and load to allow internal components to properly seat and adjust.
Check oil levels frequently during the initial run-in, as consumption may be slightly higher. Monitor for any unusual noises or vibrations, which could indicate a potential issue. Gradually increase the workload over the first five hours, culminating in normal operating conditions.
This careful break-in ensures longevity.
Routine Maintenance
Consistent maintenance is vital for the longevity and performance of your Yard Machines Powermore 140cc engine. Regularly scheduled oil changes – typically every 25-50 hours of operation, or annually – are paramount. Inspect and clean or replace the air filter frequently, especially in dusty conditions, to ensure optimal airflow.
Check the spark plug every 100 hours; clean or replace as needed. Keep the engine housing clean of debris. Inspect all bolts and fasteners for tightness. Proper maintenance prevents costly repairs and ensures reliable operation season after season. Adhering to these steps will maximize your mower’s lifespan.
Oil Change Procedures

Begin with a warm engine, but not hot, for easier oil flow. Locate the oil drain plug, typically underneath the engine. Place a drain pan beneath the plug and remove it, allowing the old oil to drain completely. Consult your manual for the correct oil type and capacity – usually around 15-20 ounces.
Once drained, reinstall the plug securely. Remove the oil fill cap and carefully pour in the new oil. Check the oil level with the dipstick, ensuring it’s within the recommended range. Dispose of the used oil responsibly at a recycling center. Regular oil changes are crucial for engine health.
Air Filter Cleaning/Replacement
A clean air filter is vital for optimal engine performance. Locate the air filter housing, usually on the side of the engine. Remove the cover and inspect the filter for dirt and debris. If the filter is lightly soiled, gently tap it to remove loose particles or use compressed air – blowing from the inside out.
For heavily soiled filters, replacement is recommended. Ensure the new filter is the correct type for your Powermore 140cc engine. Install the clean or new filter, ensuring a proper seal. Reattach the air filter cover securely. Regular inspection and maintenance will prolong engine life.
Spark Plug Inspection & Replacement
Regular spark plug inspection is crucial for reliable engine starting and efficient combustion. Locate the spark plug, typically near the top of the engine. Carefully remove the spark plug wire, avoiding a shock. Use a spark plug wrench to unscrew the plug. Inspect the electrode for wear, fouling, or damage.
If the plug is worn or fouled, replace it with a new spark plug of the correct type. Gap the new plug according to the engine specifications. Reinstall the spark plug, tightening it to the recommended torque. Reconnect the spark plug wire securely. Proper spark plug maintenance ensures optimal engine performance.
Troubleshooting Common Issues
Encountering problems with your Yard Machines Powermore? Several common issues can arise. If the engine won’t start, check the fuel level, spark plug, and air filter. A rough-running engine often indicates a dirty carburetor or stale fuel. Difficulty with the self-propel system may stem from a disengaged drive cable or worn drive belt.
Consult online resources like YouTube for MTD Powermore engine troubleshooting guides. Remember safety first – disconnect the spark plug wire before any inspection. Addressing these issues promptly will keep your mower running smoothly. Regular maintenance can prevent many problems from occurring in the first place;
Engine Not Starting
A non-starting engine is a frequent concern. First, verify sufficient fuel in the tank and ensure the fuel shut-off valve (if equipped) is open. Check the spark plug – disconnect it, inspect for fouling, and test for a spark using a tester. A clogged air filter restricts airflow, hindering starting; clean or replace it. Confirm the recoil starter is functioning correctly and engaging the engine properly.
If these steps fail, the carburetor might be the culprit. Consult YouTube tutorials for carburetor troubleshooting on Powermore engines. Always disconnect the spark plug before working on the fuel system. Remember proper safety precautions when handling fuel and electrical components.
Engine Running Rough
A rough-running engine often indicates fuel delivery or ignition issues. Begin by inspecting the spark plug for wear or fouling; replace if necessary. A dirty air filter restricts airflow, causing a rich fuel mixture and rough operation – clean or replace it. Check the fuel lines for kinks or obstructions, ensuring a consistent fuel supply.
Carburetor problems are common. Consider a carburetor cleaning as outlined in online resources, like YouTube tutorials for Powermore engines. Ensure proper fuel mixture by adjusting the carburetor settings (refer to the manual for specifics). Old or stale fuel can also cause rough running; drain and replace it with fresh fuel.
Difficulty with Self-Propel System
If the self-propelled function isn’t engaging, first ensure the drive control lever is fully pressed and held. Check the drive belt for damage, wear, or slippage – a broken or loose belt will prevent self-propulsion. Inspect the drive system’s gears for any visible damage or broken teeth; these require replacement if faulty.
Low engine speed can also hinder self-propel. Verify the throttle is set correctly and the engine is running at the appropriate RPM. Lubricate the drive wheel axles to reduce friction. Consult the manual for specific instructions on adjusting the self-propel system, as variations exist between models.
Carburetor Cleaning & Adjustment
A dirty carburetor is a common cause of engine issues. Begin by disconnecting the fuel line and carefully removing the carburetor. Disassemble it, noting the position of all parts. Use carburetor cleaner to thoroughly clean all jets, passages, and the float bowl, ensuring no clogs remain.
Reassemble the carburetor with new gaskets if necessary. Adjust the idle speed screw and the mixture screw (if equipped) according to the manual’s specifications. Refer to YouTube tutorials for visual guidance on MTD Powermore 140cc carb cleaning. Proper adjustment ensures smooth idling and optimal performance.
Safety Precautions
Always disconnect the spark plug wire before performing any maintenance to prevent accidental starting. Wear safety glasses or a face shield to protect your eyes from debris. Never operate the mower with a damaged safety shield or without the grass catcher in place.
Ensure the area is clear of people and pets before starting. Avoid operating on steep slopes to prevent loss of control. Refuel only when the engine is cool and in a well-ventilated area. Be mindful of hot surfaces after use. Read the entire manual before operation for complete safety guidelines.
Understanding the 2-in-1 Deck (Side Discharge & Mulch)
The Yard Machines Powermore 140cc mower features a versatile 2-in-1 deck, offering both side discharge and mulching capabilities. Side discharge is ideal for taller grass or larger areas, expelling clippings to the side for easy collection or dispersal.
Mulching finely chops grass and returns it to the lawn as fertilizer, promoting healthier growth. To switch between modes, utilize the provided discharge plug. Ensure the plug is securely in place for mulching operation. Regularly inspect the deck for buildup to maintain optimal performance in either mode.
Height Adjustment Mechanism
The Yard Machines Powermore 140cc mower utilizes a dual-lever height adjustment system, providing convenient control over the cutting height. Located on both the front and rear wheels, these levers allow for simultaneous adjustment across the deck.
The cutting height ranges from 1.25 inches to 3.75 inches, catering to various lawn conditions and preferences. Simply squeeze the levers and move them to the desired position, ensuring both sides are set to the same height for an even cut. Regularly check the lever locks to prevent accidental adjustments during operation.
Finding Replacement Parts
Locating replacement parts for your Yard Machines Powermore 140cc mower is readily achievable through several avenues. Online retailers like Amazon offer a wide selection of PowerMore mower parts and accessories, including blades, wheels, and engine components.
MTD, the parent company of Yard Machines, also provides a dedicated parts lookup tool on their website. Local hardware stores and lawn equipment repair shops frequently stock common replacement parts; When ordering, always have your mower’s model number handy to ensure compatibility. Genuine MTD parts are recommended for optimal performance and longevity.
Where to Download the Official Manual
Accessing the official Yard Machines Powermore 140cc manual is crucial for comprehensive guidance. InstructionMore is a valuable resource, offering downloadable official guides for unpacking, inventorying, and understanding key components like the engine, handlebars, and wheels.
The MTD Products website, as the manufacturer, is the primary source for official documentation. Search using your specific model number to locate the correct manual. Many manuals are available as PDF downloads, allowing for easy access and printing. Retaining a digital copy ensures you always have the information at your fingertips for maintenance and troubleshooting.
Warranty Information

Yard Machines Powermore 140cc lawn mowers typically come with a limited warranty covering defects in materials and workmanship. The duration of the warranty varies, often ranging from 90 days to one year for parts and 2 years for the engine, but always confirm specifics with your retailer or MTD Products.
Warranty coverage generally excludes items subject to normal wear and tear, such as blades, belts, and spark plugs. Proper maintenance, as outlined in the owner’s manual, is essential to maintain warranty validity. Register your product with MTD Products to streamline any potential warranty claims. Keep your purchase receipt as proof of purchase.